Creating a launcher icon with Adobe Illustrator template 2
To create an icon with your own individual background, use the 2_S40_FT_Launcher_Icon_Illustrator_Template_INDIVIDUAL.ait template and follow these steps to give your graphic the correct shape, shadows, and highlights.
Preparations
Open the template file via the menu bar (File > Open > select file to open).
Place your graphic
Select the PLACE YOUR GRAPHIC HERE layer and draw or place your background graphic on that layer.
Scale the graphic
Scale your graphic to fit the dimensions of the canvas. It may be necessary to temporarily group your graphic (CTRL/CMD + g) to scale it proportionally.
Option 1: Mask a background shape
If your background shape consists of an illustration or larger composition, you will need to mask it.
Move the layer containing your background graphic underneath the CLIPPING PATH (MASK) layer, so that the mask applies the correct shape to your individual background.
To avoid flat, distorted edges, make sure your graphic is larger than the 50 x 50 pixel mask area. Your final icon should be a smooth Squircle shape as shown below.
Option 2: Use a custom background and a custom glyph
If you prefer to combine your custom background shape with a foreground glyph or logo, you can do as follows:
Follow the previous set of steps to add, and mask the custom background..
Paste or draw the logo or glyph onto the PLACE YOUR GLYPH HERE layer.
Scale your graphic to fit the dimensions of the background below, and ensure it is in the centre of the focal zone (guides). It may be necessary to temporarily group your graphic (CTRL/CMD + g) to scale it proportionally.
You can also switch to Illustrator’s pixel preview (View > Pixel Preview) to locate unwanted anti-aliasing effects and amend the image if necessary. If possible, align your shape / the anchor points into the pixel grid in order to avoid unwanted “half pixels”. Please note that moving the anchor points does change your original shape, so make sure you find a balance between creating crispness and preserving the original shape.


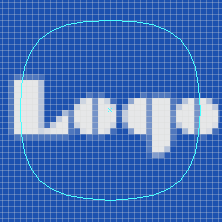
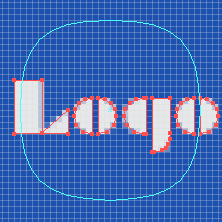
The images above show two versions of an icon in an activated pixel grid view. In the image on the left, an unwanted anti-aliasing is added to straight lines when the glyph's borders do not follow the grid lines (i.e., pixel borders). In the image on the right, the glyph is crisper and cleaner, as it is aligned to the pixel grid.
Tip: To be able to move the nodes of an individual piece of glyph or logo, you may have to create outlines (e.g., right-click on the selection and select Create Outlines), ungroup the item (e.g., right-click on the selection and select Ungroup), remove current selection (e.g., Select > Deselect), and then click on the part of the glyph or logo the nodes of which you wish to edit.
Apply graphic style
To apply the graphic style, first select the glyph or logo element that has been placed on top of the background. If your icon consists of a combination of several elements, you will need to select them all in order to create a compound shape.
Select View > Graphic Styles to open the Graphic Style palette and apply S40_FT_Launcher_Graphic_Style. This will automatically apply the required drop shadow to your icon.
The icon design is now complete.
Save as PNG
The final step to complete the icon is to save it using the correct PNG settings.
In Adobe Illustrator CS5 or higher, select File > Save for Web & Devices, apply the settings as shown in the screenshot below, and click Save to save your PNG icon in the directory of your choice.
Save as PNG with Adobe Photoshop
To finalise your icon using Adobe Photoshop, follow the steps below.
In Adobe Illustrator:
In your Adobe Illustrator document, select the layer palette. In order to transfer all the necessary layers to Photoshop, these need to be unlocked first. Unlock the layers “DO NOT EDIT – HIGHLIGHT”, “HIGHLIGHT”, “DO NOT EDIT – BOUNDING BOX”, “BOUNDING BOX” and your selected background colour layer by clicking the lock indicators.
Select all elements of your Adobe Illustrator document (CTRL/CMD + a) and copy them (CTRL/CMD + c) into the clipboard.
In Adobe Photoshop:
Open Adobe Photoshop and create a new document with a canvas size of 56 x 56 pixels and the settings shown in the screenshot below:
Select your Photoshop document and paste the icon from the clipboard centred on the canvas (CTRL/CMD + v).
Select File > Save for Web & Devices, and apply the settings shown in the screenshot below:
Click Save to save your PNG icon in the directory of your choice.
Be sure to keep copies of the Illustrator and Photoshop files in case changes are required at a later date.
If you want to produce another icon, open the Illustrator template again, and use a new file for each icon.